Winners #DIYchallenge – Valentine’s Day

Thank you so much for all the beautiful entries in this week #DIYchallenge. We can definitely tell so much love was put into each and every one of the projects!

This week’s winners are:

Chicogal Maulik

#DIYCHALLENGE Valentine’s Day

“For my Valentines, I made a small ornament that was fun using a felt heart cutout, and the large heart is a covered wooden heart. I love making these wall hangings, and seeing what I come up with. Happy Valentines Day everyone!!!”

Hilary VanDyke

#DIYChallenge Lovely Bead Loom Bracelet

“Bead My Valentine ” some of these challenges definitely take me out of my ‘comfort zone ‘. That’s one of the reasons I love participating. I made this choker necklace and bracelet set on the cousin diy bead loom.

If you are a winner, please send us a DM to CousinDIY on Facebook or email us at socialmedia@cousin.com

?

Interested in joining the #DIYchallenge? Join our Facebook Group for a chance to win $50 of jewelry making supplies!

Hello 2021, Whether we’re Ready for You or Not

I know a lot of us, much like myself, are sporting the matching sweatpants and sweatshirt look still. However 2021 is here and along with it came new jewelry trends. 

So …. 

What’s Trending?

Before sitting down to write this blog post I took a look back at the post I wrote last year and oh boy, have the trends changed. Isn’t it funny how that happens. Maybe it’s just me, but I’m always amazed how something that was so prominent last year at the same time is now irrelevant. 

Not to harbor on the past, but the 2 biggest trends of last year, pre Covid-19 if you can remember those days, were the Mamma Jamma Hoops and Coin Pendent Necklaces. While cleaning out my own jewelry cabinet, I found both of these that I purchased because I “had to have them.” Honestly I can’t even guess when I wore them last. 

Let’s roll into what’s trending in 2021 and see how we can DIY and recreate these trends!

Chain on Chain on Chain.. oh did I mention on Chain

This is probably the biggest trend for 2021 thus far. Gold, silver, rose gold you name the metal, they have it. This trend extends to all jewelry from necklaces, bracelets to even earrings! 

This jewelry set we created embodies this trend to a T. And I mean it. The mixing of the size of the chains, layering and stacking them on top of one another and the whole matching – yet not matching set. 

If you want to amp this up and add a little something extra throw on an old-rustic-almost-looking lock. Maybe not to the earrings that could start to get a bit heavy. But the necklace or bracelet for sure! 

The only rule when it comes to this trend is don’t mix your metals – stick to one and if you think its “too much,” its not .. add more. 

DIY here 

If you can’t spot me by my earrings, they aren’t glitzy enough.

Spotted: all the gorgeous girls are wearing big shiny earrings, but how many crystals are too many ladies? 

Did anyone else read that in Gossip Girl’s voice? Maybe just me, but this trend reminded me of all the insanely-beautiful-over-the-top earrings the actresses wore in the show. 

In line with the chain jewelry trend, you want these to be your biggest, baddest pair of statement earrings. There’s never enough sparkles, crystals or diamonds (if you’re lucky enough) and the bigger the better! 

Also, kind of funky. You don’t want a simple, predictable pair of crystal drop earrings. You want something that you’re almost uncomfortable with because it’s SO outside your comfort zone. When you walk by someone at a concert, or more like in the grocery stores these days, the first thing you want people to notice are your earrings. THAT is the trend!

We decided to go with gold hardware for these and our funky twist was to add long gold spikes. This was spontaneous, but it separated us from others. Although the spikes aren’t traditionally what you’d see, it worked! 

The fact that they didn’t go together made them go together.

DIY here 

Purse? Necklace? Wait .. what is that? 

This trend is magical. That’s the only way I can describe it .. magical. I don’t know about you but I hate having to carry a purse. It’s heavy, it slides off my shoulder and sometimes I’m only bringing it to hold my phone and wallet. 

In all of my years on this planet I have exhausted every feasible option as a solution to my ongoing predicament …. 

  • The little card holder that attaches to the back of your phone – yeah I shoved too many cards into it. Needless to say the sticky stuff suddenly became not sticky. 
  • Carrying a wristlet (remember when these were all the rage in college) although no one told you, you had to have that thing around your wrist at all times or like myself you end up leaving it places 
  • The backpack. At first it was a miracle, you can be hands free and it’s not going anywhere. However I learned if you needed to get something from inside, it wasn’t that easy. There I was one hand holding the backpack while the other was trying to unzip it. Now the bag was swaying back and forth and I was trying to get something out without totally having to shove my head inside. Not to mention the process I had to go through just to be able to try and get something out from it. Not sure what I mean? Much like driving a car I had to signal to pull over and get to the side, so I wasn’t that person stopped abrupt in a crowd of people. I have one word for “backpack,” a synonym, headache. 

If you couldn’t tell from my over sharing I’ve tried everything and feel like nothing worked. However this new trend is one I can’t sweat off, over stuff, or need the use of a blinker to get access to. 

The necklace-bag. Yes, one word necklace-bag in all of its glory. 

I know what you’re thinking? Isn’t CousinDIY a DIY jewelry company? Although you are correct, we were able to recreate this trend with all our own products! We picked the size, shape and colors we wanted to use and got to work. I still can’t get over this.

We decided to make one to fit my phone and wallet and it’s been great. I wear it around my neck and it’s just like a necklace. It doesn’t get in my way and I don’t have to take it off to get something from it.

DIY here 

Oh honey, those are my pearls 

To be honest this was a trend that I wasn’t stoked about at first. I don’t know if anyone else has a specific image or memory of pearls, but I’ll share mine with you.

I imagine my sweet grandmother with short brown hair, rocking her stud pearl earrings with a matching bracelet. Let me tell you she rocked them, but this is pretty much the only thing I associate with pearl jewelry. 

I’m not wrong very often (I hope you laughed at that one cause I sure did), but this is yet another moment where I was incorrect. This trend came in with force and proved me wrong. 

This was the most transformative trend for me. Like I said earlier, I had a strong image and idea of what pearl jewelry looked like that when I saw the modern spin on it, I was all about it. 

I love gold. I’m not a silver or rose gold gal myself, so mixing these two together was a moment for me. It’s no longer just a simple pair of stud pearl earrings with a single drop pearl necklace. The mixing of tones, shapes and textures helps to bring it alive for me. So of course I had to go shopping I mean .. could you blame me? 

Not to get on a tangent here, but what I love too about this and all these trends is that they are DIY.

In case anyone was interested, my grandmother was thrilled when I shared with her that I joined the pearl game. 

DIY here 

Have I charmed you yet? 

That’s right if you haven’t already guessed it by my incredibly unfunny joke the last trend I’m going to mention is charm bracelets! 

This just made me smile. How can you see the words charm bracelet and not? It reminds me of my childhood and those iconic silver Italian charm bracelets that everyone had! Only those were notorious for pinching your skin.

Although you don’t see as many of those bracelets today, there’s a new trend in town. 

To recreate this trend successfully, it’s important to use chain as the base. We picked silver but any metal will work. And then, add your charms! Mix them up, make it funky and more importantly keep it original! 

We paired a mixture of softer charms such as the turtle and sun with edgy ones like the spike and dome for example. This is such a great trend and doubles as a perfect gift! Super easy to personalize and make it sentimental. 

DIY here 

Is that it for 2021? 

Congrats! You’ve made it to the conclusion of my endless babble about 2021 jewelry trends! I don’t know if I’m more excited you made it or I did! 

Either way we’re here, we did it and that my friends is something to celebrate. 

PLEASE, PLEASE, PLEASE if you recreate any of these trends share them with us. I want to see everyone rocking these 2021 jewelry trends. Upload photos of them to Instagram using #createwithcousin so we can see your creation and feature you! 

Well it’s been great, see ya next year for 2022? 

Winners #DIYchallenge – Winter Blues

So many beautiful entries, it was hard

This week’s winners are:

Melissa Martinez

#DIYCHALLENGE Winter Blues – Beautiful statement ice necklace!  

Serena Garland

#DIYChallenge Blue and Gold Jewelry Set

If you are a winner, please send us a DM to CousinDIY on Facebook or email us at socialmedia@cousin.com

?

Interested in joining the #DIYchallenge? Join our Facebook Group for a chance to win $50 of jewelry making supplies!

The Ultimate Guide to the Many Different Types of Pearls

Globally speaking, experts think the pearl market could exceed $16.8 billion by 2022. Knowing the types of pearls out there will help you create and select trendy jewelry on your own.

In 2018, pearly only accounted for two to three percent of retail jewelers’ sales. Now, pearls are gaining popularity, and they’re especially trendy amongst millennials.

If you don’t know your pearls, you could get ripped off. Learning about pearls will make you an informed consumer, and an informed consumer is a happy consumer.

Here are some different types of pearls you should know about:

Saltwater vs. Freshwater Pearls

The two main categories of pearls are saltwater pearls and freshwater pearls. Saltwater pearls, which come from mollusks in oceans, are rarer/more high quality and more expensive as a result.

Freshwater pearls come from mollusks in lakes, rivers, and ponds. They vary in shape more than saltwater pearls do, and are mainly imported from China.

Akoya pearls are the most common type of saltwater pearl on the market. Japanese Akoya pearls are the most well-known pearls in the world.

Here are two other pearl categories to consider:

Natural vs. Cultured

Pearls are either natural or cultured. The difference is that natural pearls grow without human intervention, whereas cultured pearls grow due to a farmer inserting a mollusk into the oyster shell. Cultured pearls are more affordable and widely available than natural pearls are.

Cultured pearls are the best types of pearls for jewelry. In fact, most of the pearl jewelry on the market contains cultured pearls. Imitation pearls are entirely fake but still stylish.

Akoya pearls are usually cultured, as are Tahitian pearls and South Sea pearls. Speaking of South Sea pearls:

South Sea Pearls

South Sea pearls are the most expensive type of pearl. Their large size contributes to their high market value. A strand of cultured South Sea pearls ranges anywhere between $1,000 and $100,000.

It’s important to pair South Sea pearls with high-quality metal and jewelry-making techniques. Fortunately, CousinDIY is offering a free masterclass for pearl knotting techniques. There’s even a supply list for your convenience!

South Sea pearls fall into this next category:

Baroque Pearls

Baroque pearls refer to pearls with a non-spherical, irregular shape. The most valuable and expensive types of baroque pearls are Tahitian pearls and South Sea pearls.

However, most baroque pearls available are freshwater pearls. This is good if you’re making or buying jewelry on a budget.

Pearls for DIY Jewelry

Fortunately, there are pearl beads that are specifically designed for DIY jewelry. They come in different types of pearls’ colors, sizes, and materials, including glass.

Our Swarovski 8mm Powder Almond Pearls will make any piece of jewelry you create look classic and elegant. We also have Swarovski pearl beads available in cream and rose colors.

Get the Types of Pearls That Rock Your World

As a symbol, pearls represent wisdom acquired through experience. Consider yourself wiser now that you know about the types of pearls that exist.

Buying pearls online will help you save money. After all, pearls and pearl beads cost more in brick-and-mortar stores.

Get creative and classy—check out our Swarovski selection. That way, anyone who wears your handmade jewelry will look more glamorous than ever. 

4 DIY Necklaces to Gift Your Friends for the Holidays

It’s the holiday season, and that means it’s time to think of sweet and thoughtful gifts for all of the people that you love.

But what are you going to give to people? Don’t you want to try your hand at making something special, personalized, and handmade? Why not try making DIY necklaces for the best friends in your life?

We have a few suggestions so that each of your friends has a DIY necklace that they’ll love. Keep reading to learn about our favorites and make them yourself!

1. Zodiac Necklaces

Do you and your friends love talking about astrology? Whether you believe it or not, it’s fun to talk about how the sun, moon, and other celestial bodies may influence you.

Why not give your friends customized necklaces that show off their signs?

You aren’t limited to sun signs. We love jewelry that features the sun sign and the moon sign together. These necklaces are super sweet, and the pendants are classy while still being personal. 

String a few zodiac charms onto your chain or string and add some of your favorite beads, and you’ll have a cute holiday gift.

2. Name Necklaces

Jewelry with names made out of beads used to be all the rage. While they may not be as in-style anymore, you can give your friend a vintage-looking gift with a woven necklace and letter beads.

These make great chokers, and you can also make a matching bracelet.

If this doesn’t feel like the right look for you, consider opting for initials instead. Larger letter charms make a great addition to the center of any necklace to give it a subtle but personal touch.

3. Birthstone Necklaces

If you know your friends’ astrological signs, do you also know their birthstones

Birthstones are a classy way to personalize any piece of jewelry. They add a pop of color and sparkle without being too obvious. You can add them as standalone charms to a chain, but we love pairing them with woven string in complimentary colors. 

Bonus: these work well if you want to add matching rings or bracelets. It won’t look overdone. 

4. Charm Necklaces 

Remember when charm bracelets were “in?” Where did that trend go?

You don’t need to find charm necklaces and bracelets in-store. You can make them at home and give them to your friends to remind them of the time that you’ve spent together. 

It’s a good idea to leave extra space so your friends can add their own charms in the future, but also consider adding personalized charms. These can be the ones mentioned previously or ones that remind you of events you had together. You have so many options when it comes to charms!

We Love These DIY Necklaces

Are you ready to string up some DIY necklaces for your friends this holiday season? The best gift is one that comes from the heart, so your friends are sure to appreciate these customized necklaces. 

If you’re looking for supplies for your holiday jewelry crafts, check out our shop. We have everything you need for the perfect DIY necklace.

5 DIY Earrings to Try at Home

Humans wore earrings as long ago as the Bronze Age. The ancient Egyptians used them to show their high social status.

Nowadays we wear earrings to funk up an outfit or express our personality. They’re also an easy way to get started making our own jewelry.

Keen to make your own earrings? Here are our favorite DIY earrings to try first.

1. Button Earrings

Buttons are a quick and easy way to get started making earrings. The most simple method involves buttons and glue. Choose two buttons and glue butterfly studs on the back. Your earrings are done!

Get creative by painting the buttons, or cover them in glue and dip them in glitter. Fabric-covered buttons are a great choice if you want to work with texture.

This same technique works with other items. Try gluing zippers or even bottle caps to earring backs.

2. Clay Earrings

Polymer clay is a fantastic option for the more adventurous jewelry-maker. Buy candy molds or those used for baking. Press your clay into the different hollows to create shapes.

Bake the clay in the oven according to the manufacturer’s instructions. Drill holes if you want to hang them from hoops. Or glue earring posts to the back for simple DIY clay earrings.

More creative makers can mold shapes freehand. Or use mini pastry cutters for festive options!

3. Tassel Earrings

Tassel earrings never go out of fashion. DIY tassel earrings are a great way to bring some glam to your outfit.

All you need is a pair of bead caps, embroidery thread, eye pins, and earring hooks. Cut lengths of the thread that are twice the length you want the tassels to be.

Fold them in half and tie a length of thread around the midpoint. Push the eye pin through one of the bead caps. Glue the tassel into the cap.

Attach the eye pin to the earring hook to create your first tassel earring. Repeat for the matching earring.

4. Beaded Earrings

Beads come in a range of types and sizes, from tiny seed beads to large gemstone beads. This means you have plenty of options for your DIY beaded earrings, all tailored to your taste.

Try hanging a single large gemstone bead from a length of chain. This gives an elegant, minimal look.

Or create a dreamcatcher effect using seed beads. String them onto varying lengths of jewelry wire. Hang the longest from a hoop. Then add the rest of the beaded lengths in size order, from longest to shortest. Repeat on either side.

Our zodiac charms make a great addition to any beaded earrings.

5. Leather Earrings

Leather is a flexible choice for earrings. Try cutting interesting shapes out of thick, colored leather. Punch a hole so you can attach them to jump rings. Use these to hang them from earring hoops.

Or cut long strips of leather. Tie them through a large jump ring or hoop using a lark’s head knot (also called a cow hitch). Hang the hoop from earring loops to create DIY leather earrings.

You can boost their glam credentials by adding a Swarovski birthstone charm.

Which DIY Earrings Will You Make First?

These are just five easy ideas for your own DIY earrings. Choose your first pair by matching them with existing outfits. Or make a pair as a gift for a friend or loved one.

They’re endlessly customizable so you can make jewelry to suit your taste and style.

Keen to get started? Pick up our jewelry-making bundle for all the supplies you need to make your own amazing creations.

How to Dress Up Your Day With Wedding Hair Jewelry

Your wedding day is coming up, and there’s a lot to plan. Every aspect of this special day should be beautiful and memorable. 

As one of the most photographed days of your life, you want to be looking your absolute best. So while you’re finding the perfect dress, and scouring Pinterest for ideas, don’t forget about the final details to make your wedding day look complete. 

Wedding hair jewelry can elevate your hairstyle and make you feel like royalty while you’re walking down the aisle. 

So if you want to add that extra sparkle to reflect the magic of your wedding day (and look great in pictures), here are some ideas to get you planning. 

The Classic Up-Do

For a stunning and timeless look, many brides go for an up-do. This look can work for any hair length, and it keeps your hair off your neck as you’re dancing the night away. 

From twists to buns to pinned up curls, any variation of this classic look can pair beautifully with hair jewelry. Swarovski charms are the perfect sophisticated element to add. 

Decorate your hairpins for a simple pop of shine, or string them delicately over your up-do. 

Whether it’s classic pearls or colorful beads, find the combination that best fits your personal style.

The Boho Bride

For a bohemian aesthetic, opt for loose curls or a half-up, half-down look for the best of both worlds. 

Keep the boho look effortless and natural. Spend less time perfectly placing every curl and more time on the details that showcase your personality. Add a unique twist with zodiac charms to decorate an intricate braid.

Personalize Your Wedding Hair Jewelry 

Your wedding day should be about you and your partner if you’re looking for something extra special to add to your wedding hairstyle that still looks classic, add you or your partner’s birthstone on a string of beads to incorporate into any hairstyle.  

This subtle yet distinctive element can add the perfect finishing touch to your hairstyle and can be kept as a souvenir from your special day. 

Accent a Simple Hairstyle

If you want to showcase your hair jewelry in a simplistic way, keep it minimal. Go for a hairstyle that you know looks good on you, and add one beautiful clip to put on display. 

A popular bridal hairstyle is to pin back one side. Keep your hair down and add a larger, decorated clip as your main accessory. 

Complete Your Look

Your wedding day is your chance to take extra time for yourself. Complete your look with wedding hair jewelry that will make you feel radiant from head to toe. With something to compliment any style or personality, find the look that suits you best.

Visit our website for everything you need to make wedding jewelry just for you, and check out our blog for more DIY ideas. 

The Zodiac Birthstone Guide: Know Your Star Sign

Gemstones sparkle and shine, making them fantastic jewelry pieces. But, these Earthly treasures hold more than superficial beauty. 

The compounds that form these precious stones also give off properties that heal the mind, body, and spirit. Depending on your birthdate, certain gems compliment you more than others.

Read on to learn about your zodiac birthstone!

Aries (March 20-April 19)

Diamonds complement the nature of these natural-born leaders. The diamond transmits fearlessness and fortitude, and it brings one to enlightenment. This stone also calms the erratic temper of an Aries.

Taurus (April 20- May 20)

Emeralds bring luck to the Taurus, who keeps them near. They symbolize Venus, the ruling planet of Taurus, and the governess of love. This brings growth and fertility either physically or figuratively to the wearer’s life.

Gemini (May 21- June 20)

Symbolizing the duality between joy & sorrow and life & death, the pearl perfectly fits with the double-sided twin. Gemini can often struggle with authenticity when seeing things from two perspectives, and the purity of this stone brings all truth to light. Pearl also helps focus the attention of this often torn zodiac.

Cancer (June 21- July 22)

Moonstone highlights compassion and kindness in the sensitive Cancer. It draws energy from the light of the moon and the tide of the ocean, bringing order to the fluctuating emotions of the crab. It also amplifies their intuition and nurturing nature.

Leo (July 23- August 22)

The lion’s passionate nature roars loudly, making them both loyal and prideful beings. The peridot makes a perfect Leo birthstone as it enhances the heart chakra’s influence on their warmth and generosity while stifling back the arrogance. This stone also enhances Leo’s natural creativity.

Virgo (August 23- September 22)

The practical and dependable virgin hides their vulnerability with their stubbornness. The brilliant blue sapphire drowns negative energy in its depths, purifying the Virgo and its surroundings. This radiant stone amplifies Virgo’s loving nature and wisdom, creating a flow between heart and mind.

Libra (September 23- October 22)

Opals increase cosmic consciousness, which aids in a Libra’s naturally diplomatic tendencies. This stone also offsets their self-pitying nature and transforms the energy into self-worth. The clever and down to earth scale balancer will also find more creativity and originality in the presence of opal.

Scorpio (October 23- November 21)

Topaz tends to bring luck to the scorpion. The stone of peacefulness calms the aggressive nature of a Scorpio. They may find it beneficial for meditation and psychic abilities.

Sagittarius (November 22- December 21)

The wild Sagittarius also wears Topas well. The stone calms their fire, keeping them vibrant and in control. Blue topaz will also complement the cheery optimism of a Sag.

Capricorn (December 22- January 19)

The disciplined goat can sometimes get a bit pessimistic. Garnet works well as a Capricorn birthstone as it encourages gratitude, which offsets the pessimism. This stone also brings out the stoicism of a Capricorn through higher thinking.

Wear Your Zodiac Birthstone Proudly

Whether you like the hippie look or something more refined, you can wear your zodiac birthstone with pride. Amplify your star strengths and offset your weaknesses.

Tap into your creative energy and create your own piece of jewelry! Find yours in our Swarovski crystals!

Winners #DIYchallenge – Holiday Spirit

We hope everybody is getting for the holiday. The holidays season might be a little different this year, but it doesn’t change how beautiful your submissions were! This week’s winners are:

Rosanne Rosenberger

#DIYCHALLENGE Holiday Spirit – right angle weave in holiday colors. 

Kelly Hurley

#DIYChallengeYule balls…made today.. prosperity, health, and protection…And a special Hawaiian beach themed one for me…because..#hawaiian

If you are a winner, please send us a DM to CousinDIY on Facebook or email us at socialmedia@cousin.com

?

Interested in joining the #DIYchallenge? Join our Facebook Group for a chance to win $50 of jewelry making supplies!

Winners #DIYchallenge – Thanksgiving

We hope everybody had an amazing thanksgiving. We are so grateful for our creative community! This week’s winners are:

Stacy Moana Fowler

My holiday sparkle I just put together ?

Stacy Diaz

#DIYCHALLENGE#THANKSGIVING

This is one of my favorite pair of earrings I made ? Silver tone Thankful charms accented with warm colored Czech Glass beads and Swarovski Crystals ?

If you are a winner, please send us a DM to CousinDIY on Facebook or email us at socialmedia@cousin.com

?

Interested in joining the #DIYchallenge? Join our Facebook Group for a chance to win $50 of jewelry making supplies!

Winners #DIYchallenge – Upcycle

We all have so many stuff lying around our house that are just waiting for a second life! This week’s submissions were very creative, we always love to see upcycling projects!

This week, our winners are:

Jessica Hankes

#DIYchallenge Upcycle ♻️
My mom gave me these old gunmetal color metal components out of her sewing kit. They are some kind of hook closures used in sewing to fasten pants. I thought they were a cool shape… So of course I had to turn them into earrings.✨

Sheila McCorkle

#DIYchallenge #Upcycle kid Bracelet made out of buttons.

If you are a winner, please send us a DM to CousinDIY on Facebook or email us at socialmedia@cousin.com

?

Interested in joining the #DIYchallenge? Join our Facebook Group for a chance to win $50 of jewelry making supplies!

Winners #DIYchallenge – Grateful

We are so thankful for such a beautiful community! This week’s submission were very thoughtful, we are so happy to be able to share our love for beads with all of you!

This week, our winners are:

Susan Ange Lee

#DIYChallenge#Grateful It was tempting to decorate for Christmas early this year, but I have so much to be grateful for even during this pandemic. For my Thanksgiving tree, I bought some wooden leaves from the craft store, wood burned “Grateful”, “Thankful” and “Blessed”, then glued E beads around the edges.

Serena Garland

?GRATEFUL?
#DIYCHALLENGE
Do everything you do with LOVE, it provides others with a grateful heart.
Hand-shaped sterling silver wire “love” focal with light pink double cord bracelet.

If you are a winner, please send us a DM to CousinDIY on Facebook or email us at socialmedia@cousin.com

?

Interested in joining the #DIYchallenge? Join our Facebook Group for a chance to win $50 of jewelry making supplies!

Winners #DIYchallenge – Celestial

So many projects were submitted this week, the sky is an endless source of inspiration and it was reflected in the quality of the projects submitted this week. We are so grateful for such an amazing community!!!

This week, our winners are:

Danielle Luczak

#DIYChallenge #celestial✨?I had so much fun creating these “man on the moon” earrings! ?Swarovski crystal moons accented with silver plated beads, latte color crystals and fun silver finish faces with stainless ear wires. ?

Stacy Terhes

This Moon Goddess Head piece is out of this galaxy! We love all the details of this statement piece.

If you are a winner, please send us a DM to CousinDIY on Facebook or email us at socialmedia@cousin.com

?

Interested in joining the #DIYchallenge? Join our Facebook Group for a chance to win $50 of jewelry making supplies!

Winners #DIYchallenge – Hallowwen!

Halloween is definitely our favorite holiday at CousinDIY and you guys did not disappoint us! So many spooktacular projects were submitted, it was hard to pick a winner!

This week, our winners are:

Jessica Hankes

#DIYChallenge Halloween ?Anyone a fan of The Nightmare Before Christmas? This is my Jack Skellington bracelet. Beads are from Jesse James Beads and some of them are from my CousinDiy strand that was in my review box. ???

Carmen Mendez

Her first time entering the DIY challenge! 🙂 We love to see these spooky earrings!

If you are a winner, please send us a DM to CousinDIY on Facebook or email us at socialmedia@cousin.com

?

Interested in joining the #DIYchallenge? Join our Facebook Group for a chance to win $50 of jewelry making supplies!

Don’t Let It Get Out Of Hand: DIY Mask Holders That Are Easy and Fun!

Don’t Let It Get Out Of Hand: DIY Mask Holders That Are Easy and Fun!

Tired of holding on to your mask when you don’t need it? Then you need to look at these fun and easy mask holders you can make yourself!

How many times have you made it all the way to the entry of the grocery store before realizing you left your mask in the car?

How’s that for a sign of the times? 

It appears as though Covid isn’t in a hurry to leave us anytime soon, and with the increasing number of businesses requiring face masks for entry, forgetting your mask is a no-go. 

Enter stylish and effective mask holders.

Hanging your mask on your ears may help you remember it, but it’s just too uncomfortable and could actually be negating the purpose of the mask. Taking it off between stops feels great but stowing it in your bag is inconvenient and annoying.

If this sounds like you, we’ve got the perfect fix.

Make a statement and never be left caught without your mask again with our DIY guide to making your own fun and easy mask holder.

Getting Crafty

Masks aren’t exactly the cute trend we were hoping to see in 2020, but when the world gives you lemons… sport them with style.

Aside from helping you keep track of that mask between stores or while you are driving, adding a lanyard style chain to your mask provides the perfect opportunity to show off your style and make a statement. 

When not in use, simply let your mask hang around your neck on a handy little holder, then find it exactly where you need it when it’s time to pop it back on. 

It doesn’t seem fair that masks cover the most expressive part of our faces, and we think it’s due time that you show off your personality, even in a mask. 

Glamour Magazine is fixing us up with the hottest ideas for dressing it up, but with time to burn before Covid blows over, why not get creative with your own one of a kind DIY project.

Here are some fun ideas to get you started!

Bring On the Beads

Whether you are going for a sleek look or a pop of color, beads are a fantastic choice for your custom mask holder! 

Solid colors for masks have been a go-to for diverting attention from the covering we don’t love wearing, but the basic black look starts to feel bland and boring. Bring a cheerful pop with your favorite color or go full rainbow to lighten it up and keep your mask right within reach.

Want to sport your new craft at work? Give acrylic or glass beads a try for a chic put-together look. No one will guess that this is homemade jewelry when they spot your classic shiny black beaded rope or simple feminine pink beads. 

Need a little extra energetic support through this difficult time? Why not add in a bit of gemstone character and reap the metaphysical benefits on your daily outings. Try out a dark topaz gem in your beading and allow the emotional stabilizing properties to assist you in soothing and re-energizing your mind and body.

Looking for a touch of timeless glam? A string of pearls says it all! Why not even up the ante with a Swarovski pearl accent.

Hanging On a Chain

Such a simple concept, chains are a no-fuss way to bring a little flavor to your mask.

Think about that classic glasses chain—such a handy way to never lose those specs and a cute accent to boot. Revive the trend by stepping it up to a mask chain and reap the functional benefits too!

From a bold drop acrylic chain to a simplistic rose gold link, just add a lanyard hook to either end, and you’ve got yourself a quick DIY beauty. Add a bit of personality with a charm or two, or keep it clean and simple. It’s up to you!

Have matching masks for a few members in the house, add in a little letter charm to tell them apart, and never leave home with your daughter’s pre-used mask again. 

Instead of ordering an overpriced, high fashion chain, mimic these BuzzFeed trends on a low budget with your new-found quarantine hobby!

Go Natural

Keep it earthy and simple by crafting up the natural cord. 

Looking for a fix for your man? Keep him feeling rough and tough with a leather ribbon. Not only is this practical, but the neutral dark tones are less eye-catching and will serve the purpose without drawing too much attention.

Been keen to try your hand at macrame? Try a natural jute cord and dress it up with those fancy knots! Here are a couple of beginner macrame knots to get the juices flowing. Just loop the chords onto a lanyard hook, and away you go!

Add in a bead or charm to your macrame creation for that unique, custom-to-you style. 

Wanna play up the nature vibe? Wood beads and natural cord are a match made in heaven for that hippie-chic trend. Throw-in a hamsa or peace sign charm for a little extra ‘good vibes only’ love. 

Bling It On

Add a bit of shimmer to a fashion cord by sewing on some gorgeous Swarovski bicones. 

We’ve got you covered with a DIY tutorial for this fun and easy style. Follow along through the video or download the PDF instructions to get started making this pandemic-friendly jewelry.

All you need for this one is a polka dot cord, a 28 pack of our Swarovski bicones, some lanyard hooks, and your basic sewing needle and thread.

Cut yourself a 30-inch piece of this stretch cord and fancy up the dots with a pop of Swarovski crystals. Sew the bicones onto random dots throughout the fabric and tie on the lanyard hooks. Just like that, you’ve got a unique new accessory. 

Don’t forget to leave a space for the back of your neck with no beads for comfortable wearing.

Are your eyes crossing from threading that tiny needle?

Make your life a little easier by picking up our threading tool for quick, prick-free needle threading. For this project and all your future creations, picking up the right tools can take your crafts from a chore to a much-needed outlet. 

Make It Like Jewelry

Who doesn’t love a perfectly paired piece of jewelry to finish off an outfit? 

Forget the mask-resistance and embrace this reality by thinking of your mask accessories like a piece of jewelry. 

Pair your mask holding creation to your favorite outfits and color schemes, and mix it up! Create a few different styles for your variety of looks so you can match, accent, and accessorize. 

Show up in a tidy, professional chain for work, then show off your bold, colorful self in your downtime. The sky is the limit with what you can create.

Know some fashion-forward friends who will be drooling over your new jewelry box? Create a custom style for gifts! Perhaps even add in a personalized pendant or charm to let them know you created this look just for them.

Now that’s a budget-friendly gift that packs a sentimental symbol. 

Match Your Mask Holders

Now that you’ve got the crafting bug started, your generic face mask looks a bit drab on that one of a kind holder. Why not up the style of your face-covering too?

From glitter to iron-on transfers, don’t be afraid to show off your personality. Just like sporting a gorgeous shade of lipstick, your face mask can reflect your own unique style too.

Perhaps your new sunflower studded chain needs a bright, bubbly mask to match, or your sleek black lanyard needs a bit of texture to take it to the next level.

Home-made face masks are something we never anticipated when the new year hit, but if you are keen to try your hand at jazzing up your mask game, we’re here to walk you through it with ease.

You’ll be surprised how easy it is to customize your masks and go from nuisance to accessory in a crafty afternoon.

Ready, Set, DIY

Never find yourself with sore ears or trips back to the car again.

With all of these inspire-worthy ideas, we can’t wait to see the custom pieces you create for your fashion-forward mask holders. Of course, if you ever find yourself running thin on craft ideas or need a little extra guidance to put it all together, we’ve put together tutorials and challenges to keep you going.

What are you waiting for? Shop our affordable selection of crafting materials and tools today and start creating your own personalized masterpieces.

How To Find The Perfect Necklace Length

How To Find The Perfect Necklace Length

Always getting necklaces that are too short, or too long? It’s time you get one just right! Click here to learn all about necklace length!

Art involves math. There, we said it. From the golden ratio to calculating facial proportions, art isn’t completely right-brained. 

And jewelry making, or wearing, isn’t exempt from that. Not only do makers have to calculate the supplies they need, such as bead per necklace, but they also have to think about necklace length. 

The buyer has to think about necklace length too, and everyone is different. Wondering what the sweet spot of lengths is for the most sales? 

There isn’t one – the best advice is to let your buyers choose by offering options. Want to know more about what goes into finding the perfect necklace length? 

Read below. 

Things to Consider When Sizing Necklaces (As the Creator)

There is a long-standing chart of necklace lengths, which has been around for decades. And that’s the chart most jewelers work from. 

But that chart doesn’t take into consideration that more women than ever are plus size. In fact, plus-size women are about 68% of the shopping market – but only about 20% of brands cater to them. 

We’re not saying that you can’t use classic necklace lengths, but it may be time to offer plus-size options. 

What does that mean in terms of chain size? Add about two inches to the classic chain length. 

For Extra Credit 

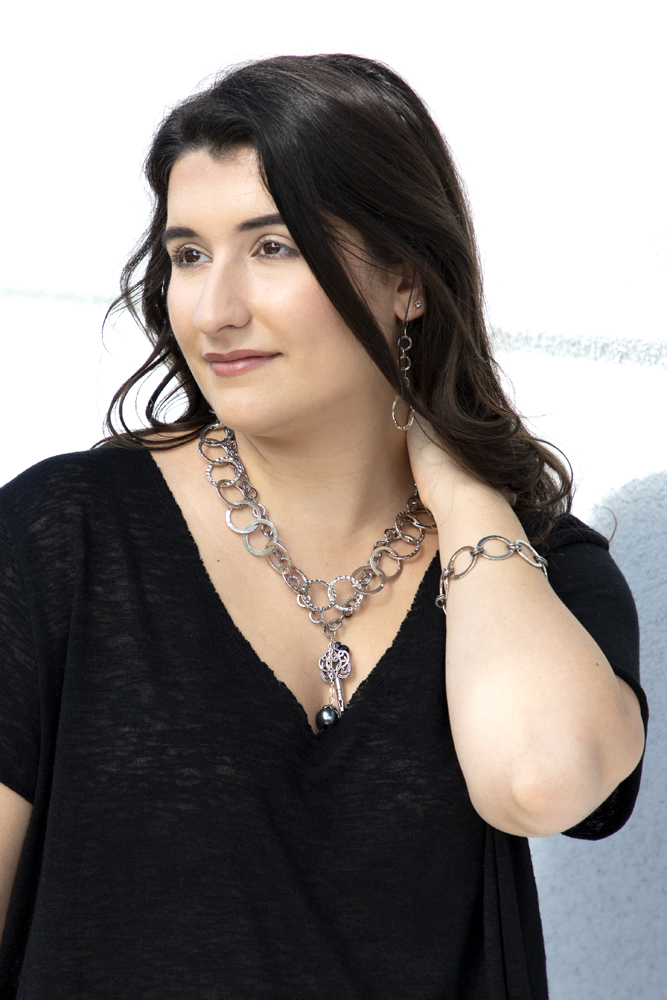
Something you’ve probably never thought about as a jeweler is showing diversity in your models. Maybe you only take solo shots of your product – but that doesn’t show anyone where a specific piece will sit. 

Think about finding a straight size (under size 12) and a plus-size model to wear your necklaces when you photograph them for your site.

Be sure to note in the description (or on the photo itself) which chain length the model is wearing. 

Don’t shy away from using male models either – gender is a construct and jewelry is for everyone! 

How to Offer Necklace Length Options 

Now that you know why you should offer multiple sizes of the same necklace, let’s talk about how you’re going to show that on your site. 

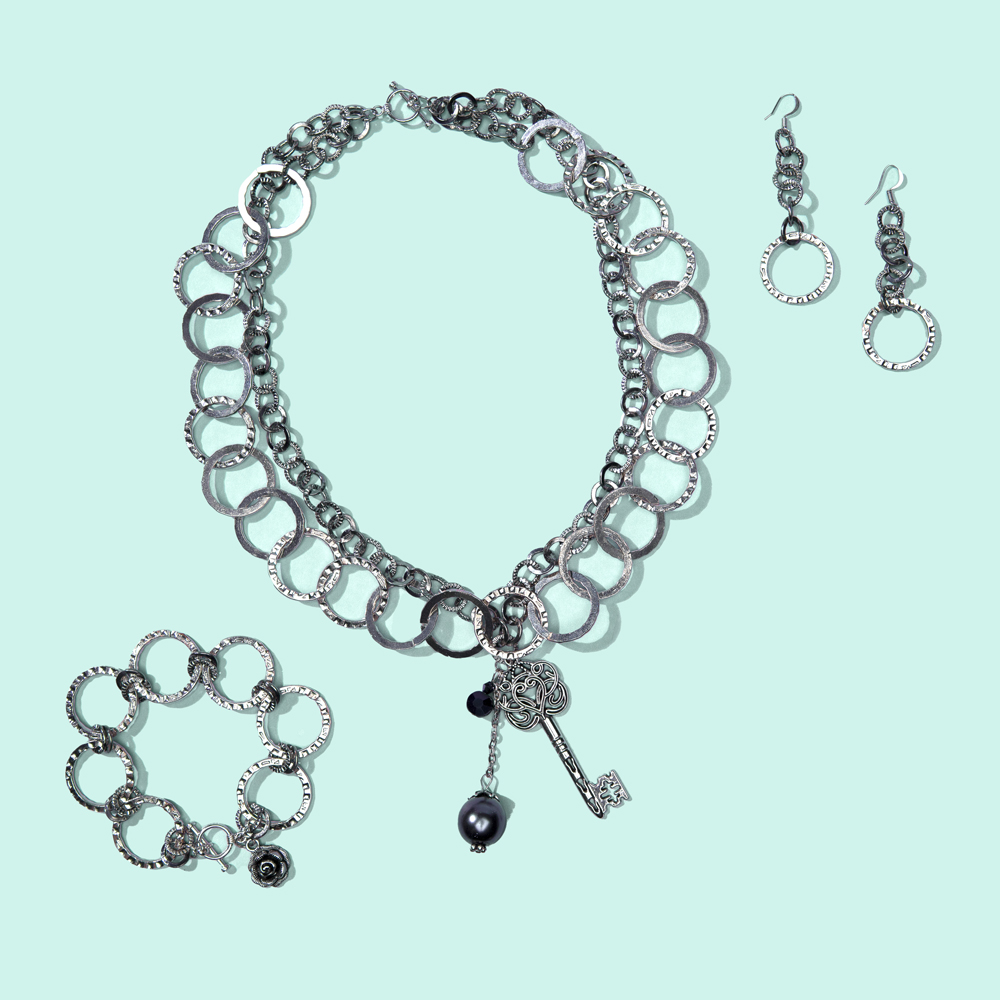
If You Offer One of a Kind Pieces 

Consider making two of each design (or as close as you can get to that) in two different lengths: one for thicker necks, and one for thinner. 

If that’s not possible, be sure to detail what length your creation is and show where it will sit on both neck types. 

If You Offer Pendant-Type Pieces 

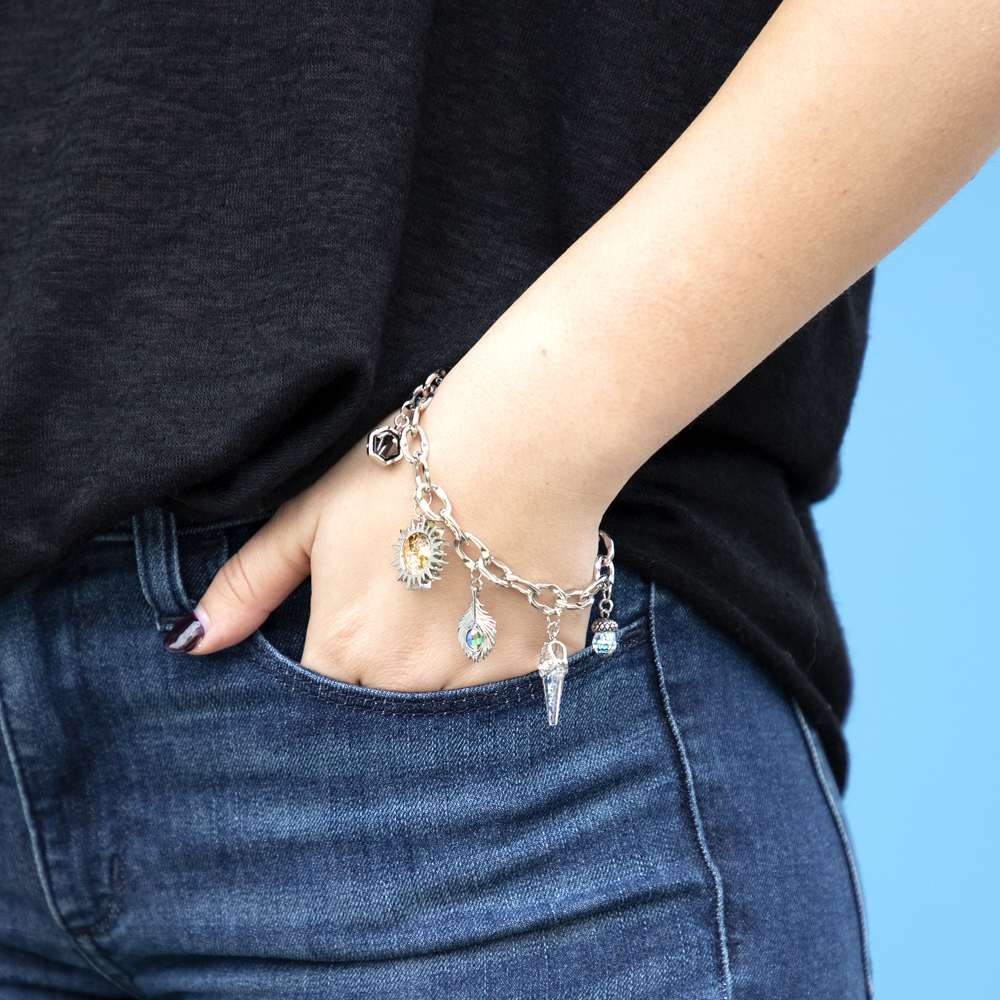
If your work is independent of chain lengths, such as charms and pendants, then it’s worthwhile to offer as many chain lengths as possible. 

If you have a certain vision for a piece and photograph it that way, that’s fine – just let your customers know they can choose their length if they need to. 

Should You Charge More for Larger Chains? 

Now, more chain costs you more money – even with our very reasonable prices. We know that. So it’s understandable that you’d want to charge more for more of a product. 

Our suggestion is to charge more for anything more than those two inches that we mentioned earlier.  

Other Length Options

Have you ever seen necklace extenders? They can be lifesavers for plus-size women or people who just want to add some versatility to their everyday-jewelry. 

There are two kinds – one is a length of chain, usually 1-3 inches that has opposite clasps on it. 

The other kind slides and extends anywhere from two inches to four. Offering these in your shop is a great way to cater to multiple people without changing your artistic process. 

How to Find the Perfect Necklace Length: A Guide for Necklace Buyers 

If you read the part above, you know that jewelry artists are starting to keep different sizes in mind, to help everyone find the perfect fit for them. 

But there’s more to consider when buying a necklace than just your neck size. Breast size, the type of shirt you’ll be wearing, whether you’re layering pieces or not, all have a role in finding the perfect necklace length. 

Necklace Length Considerations for Big Breasts 

If you’re busty, you know there are a lot of things that people don’t think about when designing clothes, or in this case, jewelry. You may struggle to wear pendant or charm type necklaces, as they get stuck and disappear in between your breasts. 

There are few ways to work around this, but unfortunately no way to completely “fix” it. 

You may want to shorten your necklace lengths or shop for shorter necklaces, so they land above the point of your cleavage. However, some women feel like that draws too much attention to their cleavage – and that’s another story. 

If that’s your issue, it may be worth it to wear that particular necklace with higher-neckline tops. That way the charm will sit on top of the fabric and you won’t have to worry about it getting lost. 

The Big-Bust Sweet Spot 

While your perfect necklace length will depend on your neck size, the kind of bra you’re wearing, and your neckline, here’s the recipe for length-buying success. 

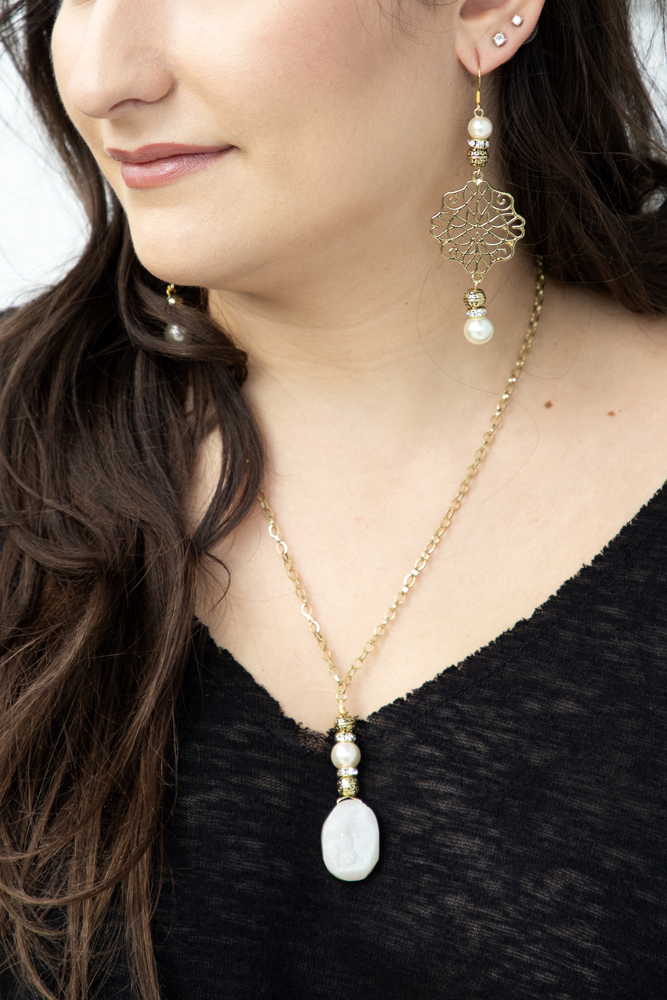
First, find the spot between your collarbones, where your skin indents a little. The top of that indent is the base of your neck – your perfect necklace length is between one and four inches below that. 

Necklace Types and Necklines

If you’re looking to match the perfect necklace to an outfit, there are visual charts online of what necklaces match which necklines, but we’ve summed it up for you, below. 

Here’s a shortlist: 

  • T-shirts: long necklaces or ones that lay mid-bust
  • Off the Shoulder: should lay about an inch to two inches above the highest point of the neckline
  • Halter: graceful, slim pendants or small charms that lay in the middle of the opening
  • V-neck: v-shaped necklaces, should end about two-three inches before fabric starts
  • Boat neck: great for layering long necklaces! 
  • Scoop neck: statement necklaces with a lot going on, ideally in the same shape as the scoop 
  • Strapless: chokers, short charm necklaces, or delicate, short, layering pieces

If you can’t remember all that, then think about this tip: the shorter the neckline, the longer the necklace, and vice versa. 

Of course, this depends on your style, but you want to avoid your necklaces being hidden by your neckline. If you can’t see them, then what’s the point in wearing them? 

A notable exception to this tip is turtlenecks – those work best with a moderate-length rounded-shape chain or pendant necklace. Think about halfway between the bottom of your neck and the midpoint of your breasts. 

Necklace Layering: Tips for Success 

If you’re looking for a more detailed look or something more boho, you’ve probably played with layering necklaces before. And yes – there is a correct way to do it. 

Our favorite way to layer involves three necklaces, all within about 3-4 inches of each other. 

But that’s not the only way – the best formula is to make sure the lengths are proportionate: so if there are four inches between the first and second necklace, there should be approximately four (or eight) inches between the second and the third. 

When it comes to colors, you want to keep the layered necklaces in the same color temperature, like wearing warm colors (golds, browns, reds) together, and cool colors (silver, blues, purples) in another set. 

Don’t be afraid to mix media in those color palettes, though. We have some great woven cords that look perfect layered with a delicate chain or the other way around. Be playful and don’t be afraid to try new things!

Finding the Length of Your Current Favorite Necklace 

Did you recently buy – or have always had – a necklace that’s the perfect length? To buy more just like it, get out your measuring tape and that necklace. Lay both flat on a surface and measure the clasped length, then double it to get the chain length. 

Voila – it’s that easy! 

Things to Keep in Mind When Shopping for and Making Necklaces: 

There’s no perfect necklace length for everyone – and buyers appreciate having options. Giving them those options as a seller will put you above your competitors and hopefully lead to more sales! At the very least it should lead to better reviews, as people love when you go the extra mile for your customers! 

If you’re looking for materials to offer longer options, check out our stringing material section. We have everything from rhinestone chains, chunky options, stringing wire, leather cords, and more!

And as always, don’t forget to tag us in your creations, with the hashtag #createwithcousin

Order your supplies to start creating, here